Ever since Nvidia introduced their G-Sync Compatible standard in 2019, it’s never been easier to take advantage of a monitor’s variable refresh rate technology. If a monitor is G-Sync Compatible, it will automatically match your monitor’s refresh rate to the number of frames being outputted by your graphics card, ensuring a super smooth gaming experience with no screen tearing. If you want to jump to the full list of G-Sync Compatible monitors or find out how to enable G-Sync on your monitor, just click the links below.
Nvidia G-Sync Compatible monitors list How to enable G-Sync
Before Nvidia introduced their G-Sync Compatible driver, monitors fell into two categories: Nvidia G-Sync monitors, which required you to own an Nvidia graphics card, and AMD Freesync monitors, which (you guessed it) worked with AMD graphics cards. Now, though, thanks to Nvidia’s G-Sync Compatible driver, Nvidia graphics card owners can also buy an AMD Freesync monitor and still take advantage of the screen’s variable refresh rate tech. This opens up loads more of today’s best gaming monitors for you, too. I should point out, of course, that while Nvidia’s G-Sync Compatible driver technically works with every Freesync monitor, only some Freesync monitors have been officially certified as such. That’s because in order to get a big ‘C’ G-Sync Compatible badge, the monitor must have been tested and approved by Nvidia themselves. This guarantees that you’ll get a good G-Sync-like experience on your monitor free of any stutter, blinking, pulsing or other visual defects that can sometimes occur when inferior Freesync monitors are paired with Nvidia cards, and it help gives you extra confidence when it comes to buying a new gaming monitor. Some retailers have taken to calling everything ‘G-Sync Compatible’, though, so make sure you consult our list of Nvidia G-Sync Compatible monitors below to make sure it’s been properly certified by Nvidia and isn’t just a small ‘c’ compatible monitor. That’s not to say that you should steer clear of all uncertified Freesync monitors, though, as below I’ve also put together an extra list of Freesync monitors I’ve tested myself that have also worked perfectly fine with Nvidia graphics cards. Nvidia’s list of official G-Sync Compatible monitors is growing all the time, too, so it’s possible that some of these screens may eventually get incorporated into the full list in the future.
Nvidia G-Sync Compatible monitor list
To help make things easy, here’s a complete list of every G-Sync Compatible monitor that’s been officially certified by Nvidia so far, and underneath that I’ve detailed how to enable G-Sync on any FreeSync monitor so you can try it out for yourself.
Other Nvidia G-Sync compatible monitors we’ve tested:
As I mentioned earlier, the monitors listed above are only those that Nvidia themselves have deemed worthy of an official “G-Sync Compatible” badge. However, there are plenty of other FreeSync monitors out there that still provide a decent G-Sync experience over DisplayPort, even if they’re not quite worthy of a big ‘C’ Compatible sticker - such as the monitors listed below that I’ve tested myself right here at RPS. It’s not a very big list right now, but I’ll be adding more FreeSync monitors to this list as and when I get them in for testing.
AOC 24G2U AOC C24G1 AOC G2868PQU AOC Agon AG273QX Asus ROG Strix XG32VQR Iiyama GB2760HSU LG 34UC88 Viewsonic Elite XG240R Samsung CRG9 MSI Optix MAG272CQR
How to enable G-Sync on a FreeSync monitor
If you own a FreeSync monitor and an Nvidia GeForce GTX 10-series graphics card upwards (yer GTX 1050s and above etc) and would like to try out G-Sync for yourself, then it’s surprisingly easy to enable G-Sync on your FreeSync monitor. First of all, you’ll need to make sure FreeSync is enabled on your monitor. Not all FreeSync monitors have FreeSync enabled by default, so you’ll probably have to root around in your monitor’s menu settings a bit (the location will vary by monitor manufacturer) to make sure it’s switched on.
Next, you’ll need to make sure you’ve got the latest Nvidia GeForce driver installed. You can either download it from Nvidia’s website here, or open your GeForce Experience app and update it that way as per the image above.
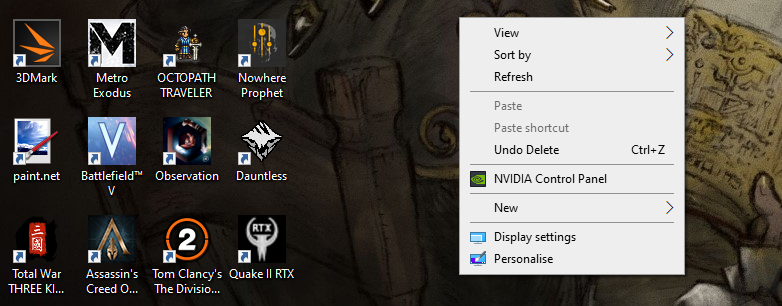
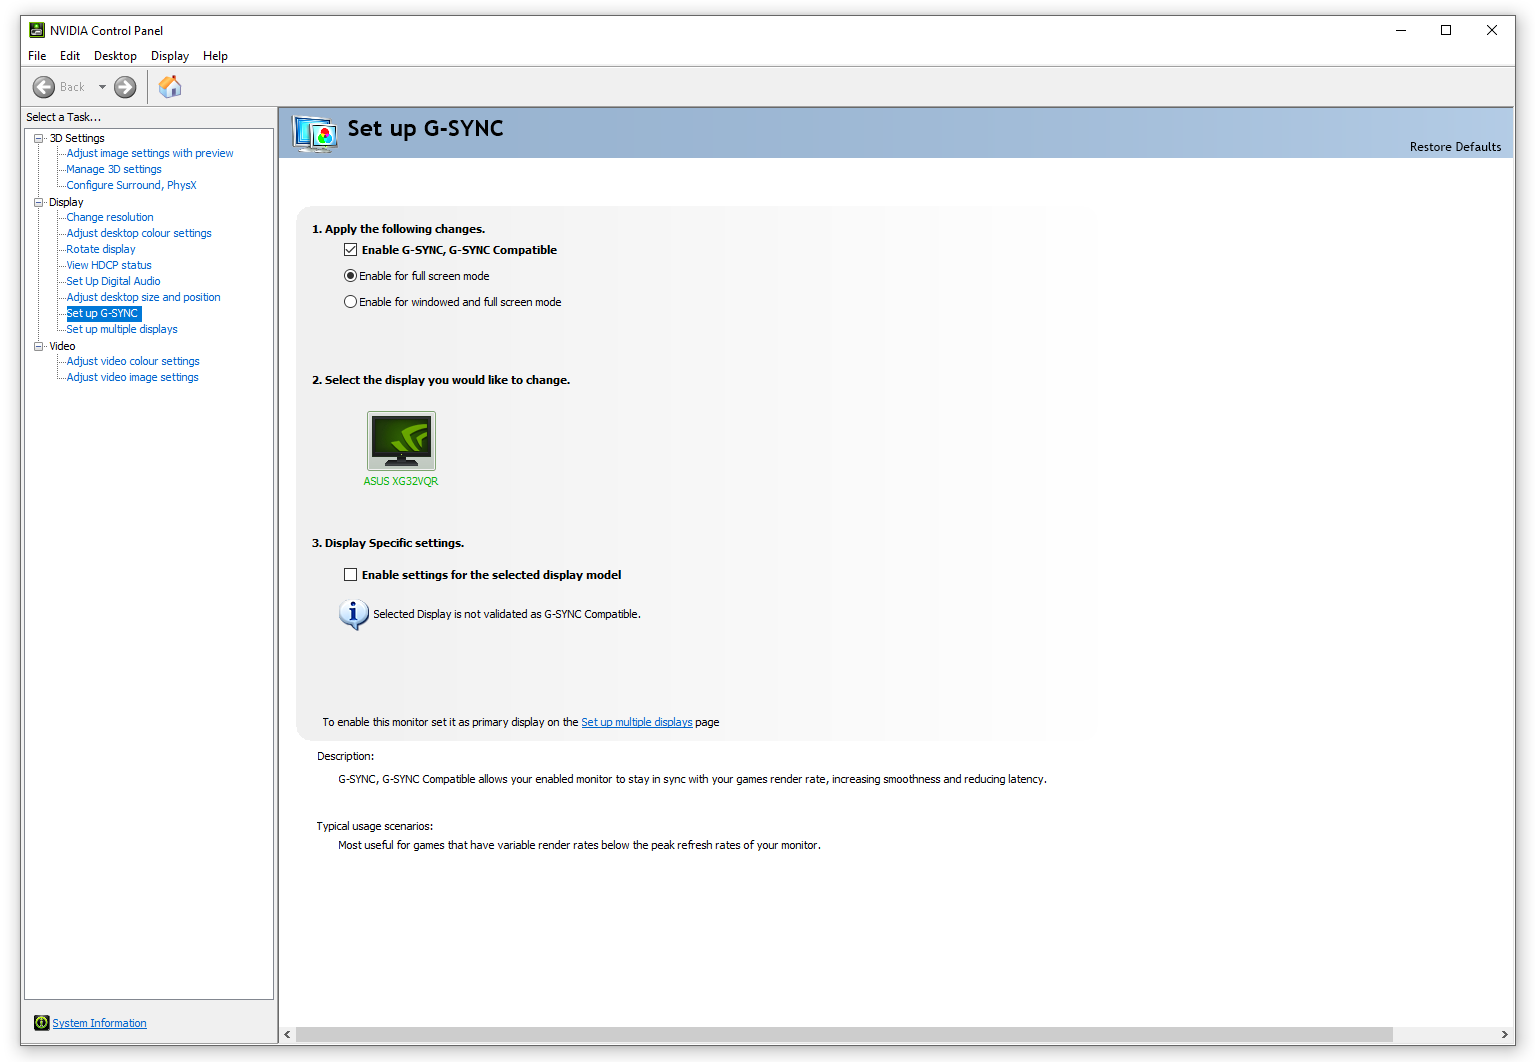
Once your display driver’s up to date, the next step is to open up your Nvidia Control Panel by right-clicking anywhere on your desktop. On the left hand side in the tree of Display settings (see below and click to enlarge), you should see a ‘Set up G-Sync’ option. Click that and Nvidia’s G-Sync menu will appear on the right.
Tick the ‘Enable G-Sync, G-Sync Compatible’ box up the top, and decide whether you enable it for just fullscreen or fullscreen and windowed mode. Once you’ve picked one of those two settings, then you’ll need to tick the ‘Enable settings for the selected display model’ box below. And that’s it! Don’t worry too much about the little message that says ‘Selected Display is not validated as G-Sync Compatible’. That’s just alerting you that the monitor isn’t one of Nvidia’s official G-Sync Compatible monitors, so your G-Sync experience may not be the absolute bestest best available. Of course, if you don’t end up liking your monitor’s G-Sync experience (if you find there’s flickering, pulsing or blanking, or something else that isn’t up to scratch), turning it off is simply a matter of unticking those boxes I’ve just described in your Nvidia Control Panel, or switching off your monitor’s FreeSync option.